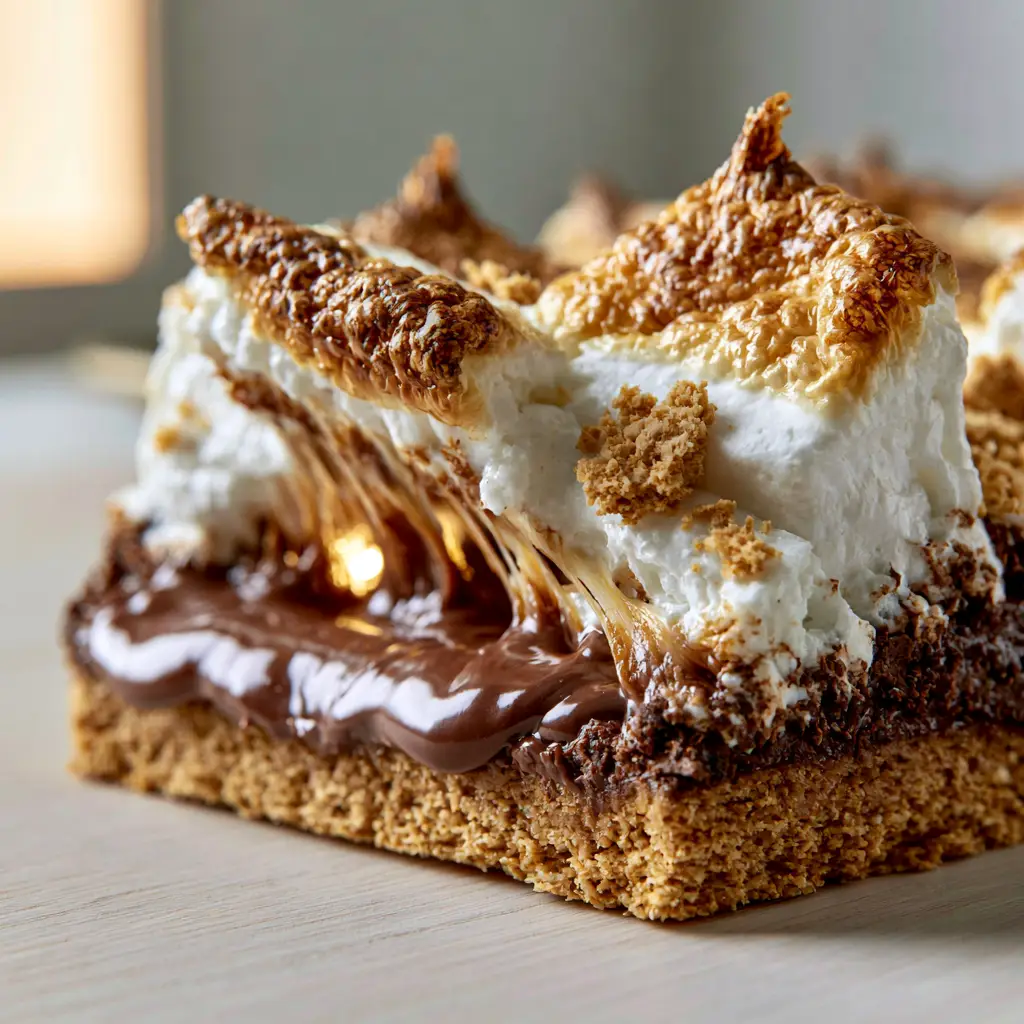
There is nothing quite like the nostalgic aroma of toasted marshmallows and melting chocolate to transport you straight to a summer campfire. These s’more bars capture that exact magic without the need for an open flame or a sharpened stick. Imagine a thick, buttery graham cracker base, a layer of glossy, molten milk chocolate, and a topping of jumbo marshmallows toasted to caramelized perfection.
When you lift a square of these s’more bars, you are greeted with those iconic, sticky marshmallow strings that stretch and pull in the most satisfying way. This recipe isn’t just about flavor; it is about the sensory experience of a macro-shot-worthy dessert. Whether you are prepping for a backyard BBQ or a cozy movie night, these bars are the ultimate crowd-pleaser.
The beauty of this sheet pan dessert lies in its structural integrity. We have engineered a crust that is sturdy enough to hold the weight of the molten layers while remaining crumbly and rich. By using a specific ratio of melted butter to graham cracker crumbs, we achieve a golden-brown foundation that stands up to the gooey marshmallow topping.
What Makes These the Ultimate Sheet Pan S’more Bars?
- The Perfect Texture Contrast: A crunch, buttery graham cracker crust paired with a soft, pillowy marshmallow center and a snappy, caramelized peak.
- Molten Chocolate Core: We use high-quality milk chocolate that stays glossy and melted long after the bars come out of the oven.
- Professional Toasting: Achieving those beautiful golden-brown peaks requires a specific broiler technique that creates deep caramelization.
- Stretchy Marshmallow Pulls: The secret to the “gooey pull” is using jumbo marshmallows packed tightly to create a continuous, elastic layer of sugar.
- Visual Appeal: Topped with extra graham cracker crumbs, these bars look like they were pulled straight from a professional food photography set.
The Secret to a Sturdy Graham Cracker Base
A great s’more bar starts from the bottom up. Many recipes fail because the crust is too thin or falls apart the moment you try to lift it. To achieve the “thick sheet pan” look seen in our visuals, we use a generous amount of finely ground graham cracker crumbs.
Graham Cracker Crumbs (3 cups / 400g): These provide the classic honey-wheat flavor profile. You can crush them yourself for a rustic texture or use pre-ground crumbs for a more uniform, pressed look.
Unsalted Butter (1 cup / 225g): Butter is the “glue” that binds our crumbs. By using melted butter, we ensure every single crumb is hydrated, leading to a crust that sets firmly in the fridge or oven. If you’re looking for other buttery delights, check out our classic holiday cookies.
Granulated Sugar (1/4 cup / 50g): While graham crackers are sweet, a little extra sugar helps the crust caramelize and provides a structural “snap” once cooled.
Fine Sea Salt (1/2 tsp / 2.5g): Never skip salt in a dessert. It balances the intense sweetness of the marshmallows and chocolate, making the overall flavor profile more complex and sophisticated.
Creating the Molten Milk Chocolate Layer
The middle layer of our s’more bars is where the decadence happens. To get that glossy, handheld smartphone photo look, you need a chocolate that melts smoothly and stays fluid. This isn’t the place for dark chocolate; milk chocolate provides the authentic campfire taste we all crave.
Milk Chocolate Chips or Bars (2 cups / 340g): High-quality milk chocolate chips or chopped chocolate bars work best. We recommend a brand with a high cocoa butter content to ensure the chocolate remains “molten” and “glossy” as it cools slightly.
Foundational Tip: If you find your chocolate is too thick, adding a teaspoon of coconut oil can help achieve that professional gloss. This layer acts as the thermal bridge between the hot crust and the toasted marshmallows above.
Achieving Perfectly Toasted Jumbo Marshmallows
The “crown” of our s’more bars is the marshmallow layer. We aren’t just melting them; we are transforming them into caramelized peaks with soft white centers. This requires a specific “Visual & Sensory Cue”: watch for the edges to turn a deep amber while the centers remain slightly puffed and vibrant white.
Jumbo Marshmallows (10 oz / 280g): Using jumbo marshmallows rather than minis allows for a deeper “stretchy pull.” When they melt, they merge into one another, creating those long, gooey strings that make for the perfect macro shot.
Graham Cracker Dust: A final sprinkle of crumbs on top provides a visual hint of the bottom layer and adds a tiny bit of grit to contrast the soft marshmallow fluff. It’s a small detail that elevates the dish from a home bake to a professional pastry. For more summer-friendly textures, explore our favorite summer pies.
Essential Equipment for the Perfect S’more Pull
To get the results shown in our
This parchment “sling” is the secret to lifting the entire sheet out of the pan. Without it, the sticky marshmallow strings will cling to the edges, and you’ll lose that beautiful side-view of the layers. A flat-bottomed measuring cup is also helpful for pressing the graham cracker crust into a perfectly even, dense layer.
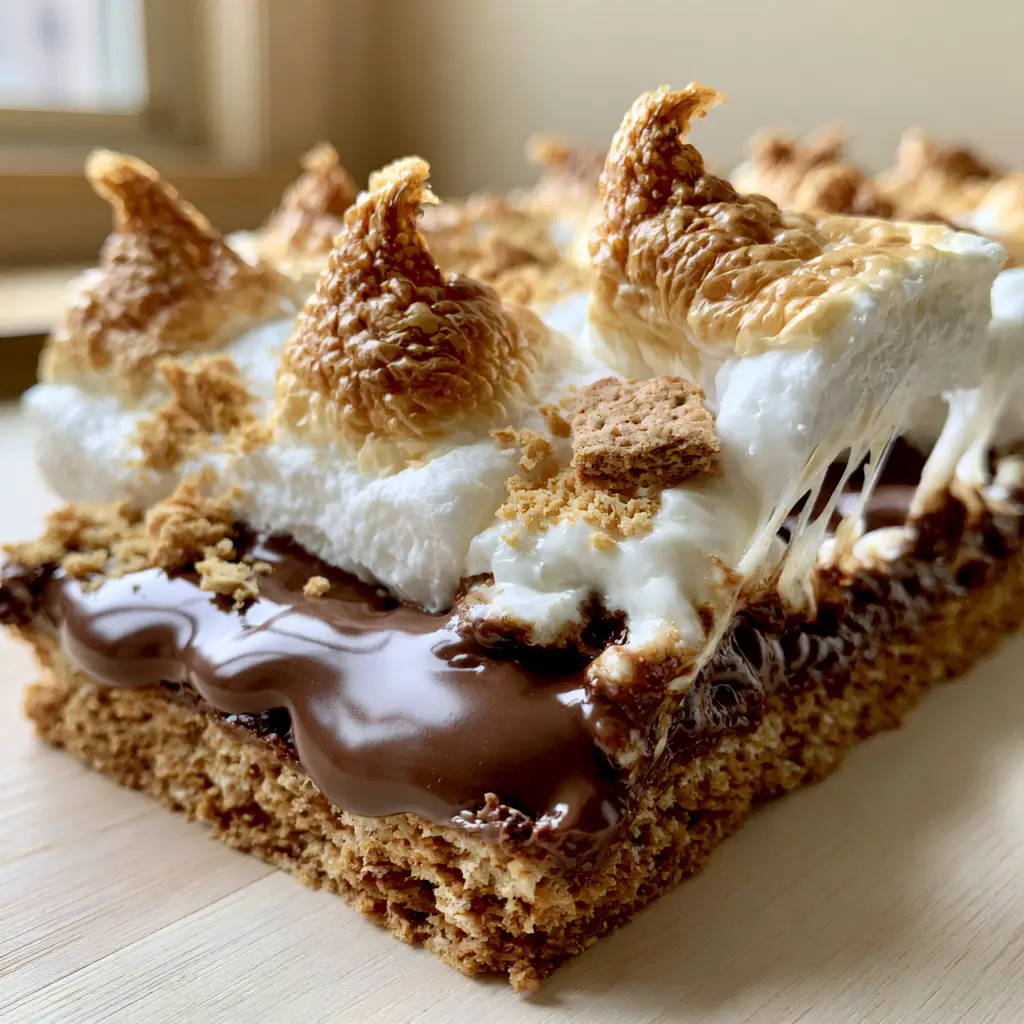
Layering Your Way to S’more Success
Phase 1: The Par-Bake
Preheat your oven to 350°F (175°C). Combine your crumbs, melted butter, sugar, and salt. Press them firmly into your lined pan. Bake for 8-10 minutes. You are looking for a “Visual Cue”: the edges should be just a shade darker than the center, and the kitchen should smell like toasted honey.
Phase 2: The Chocolate Foundation
Immediately after removing the crust from the oven, sprinkle your chocolate chips evenly over the hot surface. Let them sit for 2-3 minutes. Once they look “glossy,” use a spatula to spread them into a smooth, edge-to-edge molten layer. This ensures the marshmallows have a sticky surface to adhere to.
Phase 3: The Marshmallow Topping
Place your jumbo marshmallows on top of the chocolate. For the best “stretchy pulls,” pack them tightly together so there is no chocolate visible through the gaps. Sprinkle your reserved graham cracker crumbs over the top of the white marshmallows.
Phase 4: The Broiler Finish
Switch your oven to the broiler setting. This is the most critical stage. Place the pan on the middle rack and watch closely. In about 60-90 seconds, the marshmallows will begin to brown. Look for the “caramelized marshmallow peaks”—they should be dark golden but not burnt. Remove immediately when the centers are still soft and pillowy.
Expert Tips for the Most Satisfying Marshmallow Pull
- The Cutting Secret: To get clean slices without the marshmallows sticking to your knife, grease your blade with a little bit of butter or non-stick spray between every single cut.
- Don’t Over-Broil: Marshmallows go from “perfectly toasted” to “charred” in seconds. Stay by the oven window the entire time the broiler is on.
- The Resting Period: Let the bars sit for at least 15 minutes before cutting. This allows the molten chocolate to set just enough to hold its shape while remaining soft and gooey.
- Temperature Matters: If you want the maximum “stretchy pull” seen in our photos, serve these bars while they are still slightly warm. Once fully cooled, the marshmallow will set and lose some of its elasticity.
Storage, Reheating, and the Next Day S’more
S’more bars are best enjoyed on the day they are made. However, if you have leftovers, store them in an airtight container at room temperature for up to 3 days. Do not refrigerate them, as the cold will make the marshmallow layer tough and the crust overly hard.
To recapture that “molten” experience the next day, pop a single bar into the microwave for 10-15 seconds. This will re-melt the chocolate and soften the marshmallow, giving you back those iconic sticky strings. If you enjoy desserts that travel well, you might also like our s'mores cookie bars for a more portable version.
Perfect Pairings for Your Dessert Spread
Because s’more bars are incredibly sweet and rich, they pair beautifully with salty or acidic sides. If you are serving these at a summer party, consider balancing the plate with a refreshing cucumber and feta salad. The crispness of the vegetables cuts through the heaviness of the chocolate.
For a full “backyard feast” vibe, serve these alongside savory favorites like cowboy corn dip or a zesty elote pasta salad. The combination of smoky, salty, and sweet creates a complete dining experience that will have your guests asking for the recipe.
Common Questions About S’more Bars
You can bake them a day in advance, but they are best served warm. If making ahead, store at room temperature and reheat briefly in the microwave to soften the chocolate and marshmallow.
Absolutely! However, milk chocolate provides the traditional s’mores flavor. If using dark chocolate, choose one with a high cocoa butter content so it still melts into a glossy layer.
Yes, but you won’t get the same dramatic ‘stretchy pull.’ Jumbo marshmallows create a thicker, more elastic layer of fluff that is ideal for that iconic s’mores texture.
The secret is to grease a sharp knife with butter or a neutral oil between every cut. This prevents the sticky marshmallow strings from clinging to the blade.
A crumbling crust usually means there wasn’t enough butter or it wasn’t pressed down firmly enough. Ensure you use the full cup (225g) of butter and pack it tightly with a flat-bottomed cup.
The Ultimate S’more Bars Recipe
S'more Bars with Gooey Marshmallow Pulls and Molten Chocolate
Ingredients
Equipment
Method
- Preheat your oven to 350°F (175°C). In a large bowl, combine 3 cups (400g) graham cracker crumbs, 1 cup (225g) melted butter, sugar, and salt until it looks like wet sand.
- Press the mixture firmly into a lined 9x13 inch pan. Bake for 8-10 minutes until the edges are golden-brown and fragrant.
- Remove the crust from the oven and immediately sprinkle milk chocolate chips over the top. Let sit for 3 minutes, then spread into a smooth, glossy molten layer.
- Arrange jumbo marshmallows in tight rows over the chocolate. Sprinkle with the remaining crumbs.
- Switch oven to broiler. Place pan on middle rack for 60-90 seconds until marshmallows have caramelized peaks and soft centers. Watch constantly!
Notes
Serve warm for the best stretchy marshmallow pulls.
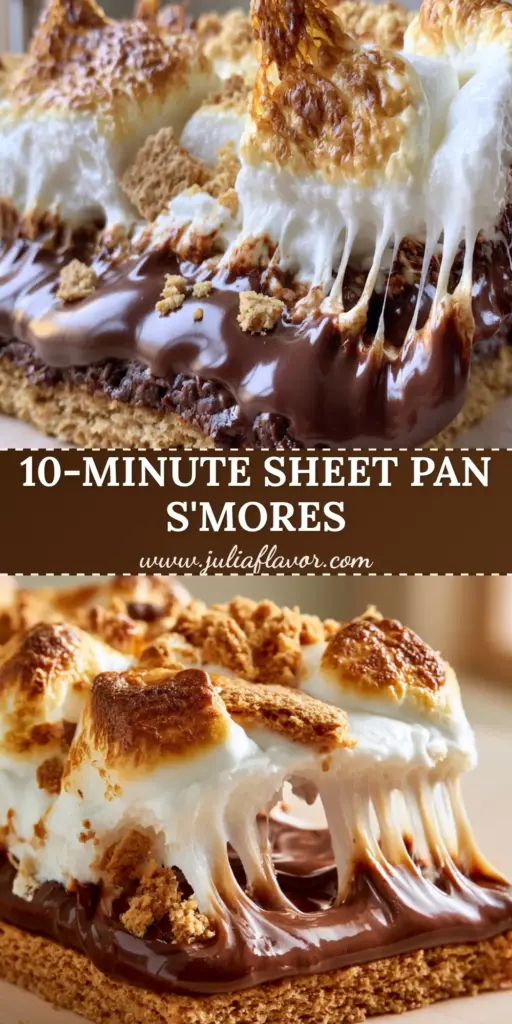
Ready to Experience the Ultimate Gooey Pull?
These s’more bars are more than just a dessert; they are a showstopper. From the thick, buttery crust to the perfectly toasted marshmallow peaks, every element is designed for maximum flavor and visual impact. We can’t wait to see your own “marshmallow pull” photos!
If you loved this recipe, please leave a comment below and let us know how it turned out. Don’t forget to sign up for our newsletter for more elite-level recipes, and share your creations with us on Pinterest. Happy baking!